
An asphalt crew starts rolling a fresh mat on a hot afternoon, and within a few passes the operator notices the drum dragging up sticky lumps of mix and tearing the surface behind him. The spray bars that should be keeping the drum wet have gone dry, so hot asphalt clings to the steel instead of releasing cleanly, and every pass leaves marks the crew now has to chase. He climbs down, taps the water tank, finds it half full, and stares at a system that ran fine an hour ago. Nothing about the roller itself failed, yet a small fault in the spray line turned a smooth job into a patchy one, and tracking down the cause fast is the difference between a quick fix and a ruined mat.
A road roller‘s water spray system keeps the drum wet so asphalt releases instead of sticking, and when it quits, the trouble almost always traces to one of a handful of failures you can find and fix yourself. Diagnosing the problem quickly saves the mat, the schedule, and the rework a dry drum invites. This guide walks through the six most common reasons a spray system underperforms:
- Nozzles clogged with debris or mineral buildup
- An empty tank or blocked water supply
- A pump that has lost prime or failed
- Cracked hoses and leaking fittings
- Faulty switches, timers, or sensors
- Flow or timer settings dialed in wrong
Here’s how to spot each one and set it right.
Blocked Nozzles Choking the Flow
Spray tips clog more often than any other part of the system, since fine asphalt dust, dirt, and hard water minerals collect in the tiny openings over time. When a nozzle plugs, its section of the drum runs dry while the rest stays wet, so you’ll often see a dry stripe or patchy wetting rather than a total failure. That uneven pattern is your first clue the tips need attention.
Clearing them takes only a few minutes and a careful hand. Pull each nozzle, soak it to loosen buildup, and clear the opening with a soft brush or a jet of water rather than a metal pin that can widen the orifice and throw off the spray pattern. Flushing the spray bar with clean water before reseating the tips clears any debris hiding upstream.
Prevention keeps the problem from returning mid-job. Running clean water, draining the system in freezing weather, and cleaning the nozzles at the end of each shift all stop the buildup that plugs them in the first place. Key takeaway: dry stripes usually mean clogged tips, so pull and clean the nozzles, flush the bar, and use clean water to keep them clear. A few minutes of upkeep prevents the patchy wetting that damages a mat.
An Empty Reservoir or Starved Supply Line
Water level is the simplest thing to overlook, and a tank that runs dry mid-shift is a surprisingly common culprit. Before chasing complicated faults, confirm the reservoir actually holds water, since a system spraying strong at the start of a job can empty faster than an operator expects on a hot, thirsty day. Checking the gauge or peering into the tank takes seconds and rules out the obvious.
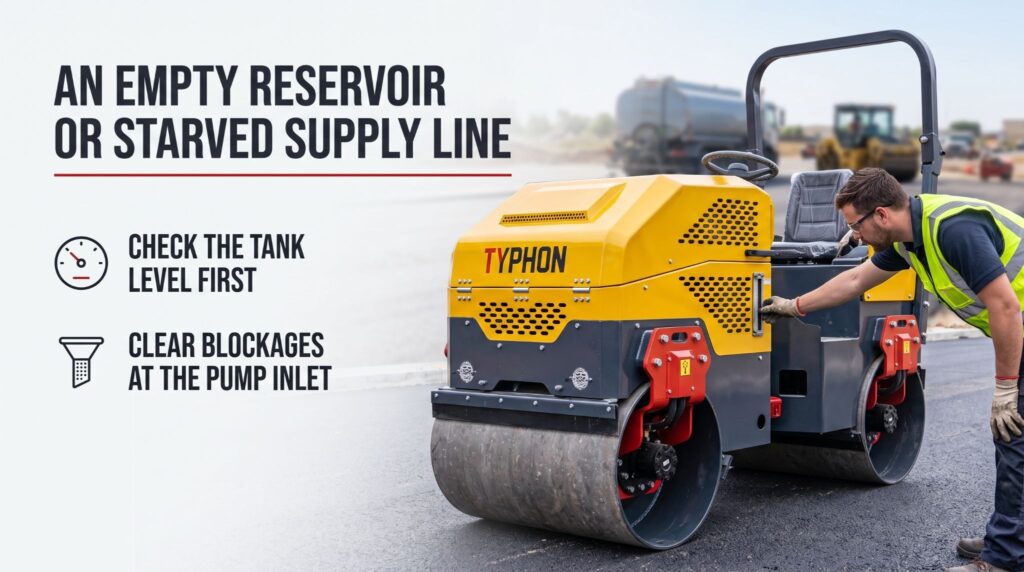
A full tank that still won’t feed points to a blockage between the reservoir and the pump. Debris, sediment, or a clogged inlet screen can starve the line even when water sits right there, so pull and rinse the strainer or filter that guards the pump’s intake. Sediment settling at the bottom of a neglected tank is a frequent source of that grit.
Air presents another supply-side trouble. A loose tank cap, a cracked pickup tube, or a low water level can let the pump draw air instead of water, which sputters the spray or kills it entirely. Key takeaway: check the water level first, then clear the inlet screen and seal any air leaks before you suspect anything deeper. Most supply failures come down to an empty tank or a starved intake, both quick to confirm.
When the Pump Loses Prime or Quits
Pump trouble stops the whole system at once, so a spray that dies completely with a full tank often points straight to the pump. Listen for the motor: a pump that stays silent when you switch it on likely has an electrical fault, while one that hums or runs without moving water has usually lost its prime or seized internally. That first listen narrows the fault fast.
Electrical faults are worth ruling out before you condemn the pump itself. Check the fuse, the wiring connections, and the ground, since a blown fuse or a corroded terminal cuts power to a perfectly good pump. A quick continuity check on the circuit tells you whether current is even reaching the motor.
A pump that runs but won’t move water needs priming or inspection. Bleeding trapped air from the line restores prime on many systems, while a pump that still fails after priming may have a worn impeller or a failed seal that calls for repair or replacement. Key takeaway: listen to the pump to sort an electrical fault from a mechanical one, check the fuse and wiring first, then prime the line before deciding the pump needs service. A methodical check saves you replacing a part that works.
Cracked Hoses and Weeping Connections
Leaks bleed pressure out of the system long before they leave an obvious puddle, so a weak or uneven spray can trace back to a hose or fitting losing water along the way. Run your eye and hand along the full length of the lines with the pump running, watching for drips, damp spots, or spray escaping where it shouldn’t. A hose that has rubbed against the frame or baked in the sun often splits at the very point you’d miss on a quick glance.
Fittings loosen with the constant vibration a roller puts through its plumbing. A connection backed off even slightly weeps water and drops pressure, so snug every clamp and threaded joint, and replace any fitting that stays wet after tightening. Worn gaskets and cracked barbs rarely reseal, so swapping them beats chasing the same leak twice.
Replacement hose should match the original in size and rating. Fitting a line too thin or a clamp too loose invites the next failure, so use proper spray-system hose and secure it clear of pinch points and hot surfaces. Key takeaway: trace the lines with the pump running to find drips and damp spots, tighten or replace leaking fittings, and swap cracked hose for the correct type. Sealing the plumbing restores the pressure a strong, even spray needs.
Faulty Switches, Timers, and Sensors
Electrical controls govern when and how the spray fires, so a system that stays dead despite a working pump and clear lines may have a fault in the switch, timer, or sensor circuit. Test the spray switch first, since a failed toggle or a corroded connection behind the dash simply never sends the signal to run the pump. Wiggling the switch or checking it for continuity reveals a contact that has quietly given out.

Intermittent spraying usually points at the timer or its wiring. Many systems pulse the spray on a set interval to conserve water, and a glitchy timer module can fire erratically or skip cycles entirely, leaving the drum wet one moment and dry the next. Inspecting the timer’s connections and confirming its settings sorts a wiring fault from a simple misadjustment.
Sensors and relays round out the control-side suspects. A moisture or level sensor reading wrong, or a sticking relay, can cut the spray even when everything mechanical checks out, so testing these components against the wiring diagram isolates the fault. Key takeaway: when the mechanicals are sound but the spray still fails, work through the switch, timer, sensor, and relay circuit. A dead or erratic control is often the hidden reason a healthy pump never fires.
Dialed-In Wrong: Flow and Interval Settings
Adjustment errors fool plenty of operators, because a system that’s mechanically perfect still sprays poorly when the settings don’t suit the job. A flow rate set too low starves the drum on a hot day, while an interval timer stretched too long leaves dry gaps between pulses, so the fault lies in the dial rather than the hardware. Reviewing the current settings against the conditions often solves the problem without a single tool.
Weather and material should drive how you set the flow. Hot, dry conditions and sticky mix demand more water to keep the drum releasing cleanly, while cooler days need less, so matching the flow and interval to the job keeps the drum wet without wasting your tank. An operator who adjusts as conditions change stays ahead of both dry drag and a rapidly emptying reservoir.
Manual valves deserve a second look too. A flow valve nudged closed during transport or cleaning quietly throttles the spray, so confirm every manual control sits where the job needs it before assuming a deeper fault. Key takeaway: check the flow rate, interval timer, and manual valves against the day’s conditions before tearing into the hardware. The right settings for hot, sticky mix keep the drum wet, and a misdialed valve is one of the fastest faults to fix.
Conclusion
A road roller’s water spray system fails in predictable ways, and nearly every one is something you can diagnose and fix on the spot. Start with the easy checks: confirm the tank holds water and the flow and interval settings match the day’s conditions. Move next to the nozzles, clearing the buildup that leaves dry stripes across the drum, then trace the hoses and fittings for the leaks that quietly bleed off pressure. If the spray stays dead, listen to the pump to separate an electrical fault from a mechanical one, and work through the switch, timer, and sensor circuit when the mechanicals check out clean. Run the checks in that order, from simplest to deepest, and you’ll spot most faults in minutes instead of losing a mat to a dry drum. Before your next job, flush the nozzles, top the tank, and confirm the settings so the system sprays clean from the first pass. When you’re ready to put a dependable, well-maintained road roller to work, reach out to a trusted equipment specialist who can pair a reliable machine with the results your projects depend on.
Frequently Asked Questions
Why did my road roller stop spraying water on the drum?
Work from the simplest cause to the deepest. First confirm the tank holds water and the flow setting suits the conditions, since an empty reservoir or a throttled valve is the most common reason. If water is present but the spray is patchy, clogged nozzles are the likely culprit, leaving dry stripes where tips have plugged. A spray that dies completely with a full tank usually points to the pump, a leaking hose bleeding off pressure, or a failed switch or timer in the control circuit. Check each in order and you’ll isolate the fault quickly.
How do I clean clogged spray nozzles on a road roller?
Remove each nozzle and soak it to loosen the asphalt dust, dirt, or mineral buildup inside. Clear the opening with a soft brush or a jet of clean water rather than a metal pin, which can widen the orifice and distort the spray pattern. Flush the spray bar with clean water to clear any debris upstream before you reseat the tips. To keep them clear, run clean water, clean the nozzles at the end of each shift, and drain the system in freezing weather.
Why does my spray system work intermittently?
Intermittent spraying usually traces to one of three things. Air in the supply line, from a loose tank cap or low water level, makes the pump sputter and lose prime, so the spray comes and goes. A glitchy interval timer can fire erratically or skip cycles, leaving the drum wet one moment and dry the next. A worn switch or corroded connection can also cut the signal at random. Check the tank cap and water level first, then inspect the timer and switch wiring to pin down the exact cause.